Tuesday, October 30, 2012

The Magic of Spray Paint: Halloween Part 2

So on the eve of Halloween, I have my second set of decorations for you - a la spray paint.  Now these could easily be parlayed into a (dare I say) "harvest" decor - I'll likely keep them around until I start the Christmas decoration blitz - so don't let my tardiness get you down - these are easy.

Now for starters, I took inspiration from Pinterest on this project, and while it wasn't a complete Pintrosity, it came close at times.

I should have known better when the "DIY steps" were listed in the Pinterest caption and the link was to Pottery Barn... You guessed it - I wanted to try the ever popular pin - DIY Mercury Glass Pumpkins...with spray paint.

deceiving image actually via not so accurate instructions/inspiration via
 
Considering that the "large" pumpkin shown is $40 and the "small" aka micro pumpkin is $25 I was thinking: "if I could even remotely pull this off, just think how much I'd save!"  Basically this Pinterest project suggests purchasing Krylon Looking Glass spray paint, spraying some plastic crummy pumpkins and then misting the not-yet-dry-paint with water to create the Mercury Glass-esque swirls.
 
Well let's just say my impatience may have played a role in this mess.  For starters, I couldn't find this so called "Looking Glass" color even after checking Michaels, Home Depot and Lowes.  So because I'm not a quitter, I picked up some Krylon Chrome.  Ok, easy enough.  I also grabbed some slightly ugly (again with all the shades of orange and tan!) plastic pumpkins from the $1 spot at Target (I basically live there)
 
that's my little plant mister in blue
 
So I apply the first coat of "chrome" to the first pumpkin and apprehensively mist on some water.
 
My pumpkin immediately looked like it had a case of severe acne.
 
pimple pumpkin
 
I'm not sure if it was the texture of the pumpkin, the fact that I wasn't using this hard to find "looking glass" or that I didn't have legit directions, but when I sprayed the other pumpkin with "chrome" (sans any water misting) it looked fine
 
acne free pumpkin
 
So now I was stuck, one with pimples and one without so in an effort to have a somewhat similar looking pair, I ended up spraying a little on the "good" pumpkin as well.  I mean, it's Halloween - things are supposed to look a little ugly - right?
 
Then I took time some time off to let these pumpkins sit, err eat some Halloween candy - whatever.  I came back the next day with a bottle that fixes everything - GLITTER!  For $2.50, a little spray bottle of silver glitter mostly masked the imperfections and gave them most of that sparkle I was looking for from a Mercury Glass finish in the first place.
 

sparkle pimple pumpkin.
 
Never one to miss out on an opportunity to zhush - I added some little stripey bows from my BOO project.  I paired these with 2 white pumpkins (purchased at Michaels for 50% off and without ANY of the hassle) on our mantel in the den.
 
 
 perfect pair of pumpkins - just couldn't help myself.
 
So, not a total Pintrosity, but like I said, we came close on this one. 
 
On a completely unrelated note: hope all my East Coast friends are safe and dry today!  My heart breaks for all ya'll and the devastation in your area!
 
xoxo,
KC
 

Monday, October 29, 2012

Weekend Recap: Finishing Details

So the title of this post would have you believe that we're close to finishing the house.  That's probably 55% true.  As it stands we've got 80% of the "improvements" we want to complete in the first year done - but only on the main level and upstairs. 

Random sidebar that will totally make sense soon...

Every year we have a BIG Christmas party - this will be my 10th year to host!  I LOVE LOVE LOVE Christmas and decorations and cookies and carols and all of it!  And our annual Christmas party really is just a big way to say thank you and Merry Christmas to all our nearest and dearest, which given the work and cost, works out pretty well as a massive "gift" to most everyone we know.

The thing is this will be another year of first for us when it comes to Christmas.  It's going to be my first Christmas away from my fam (eek, still can't quite talk about that one...) and our first Christmas in our first home.  This is also the first year that we're inviting a LOT of people from our respective companies to our annual party - holy pressure! This will also be the first time A LOT of people (new friends and lots of old!) get to see the house.

Naturally I have begun planning.  In October.
 
Step 1 of my plan includes finishing the other 20% of "improvements" we want to make to the house.  This means, finish the crown, finish the baseboards, finally paint all that stupid trim, add a back splash in the kitchen, put up window treatments, etc. etc. etc. forever x infinity - or so it feels.
 
Step 2, and the MUCH more exciting step in general, is lots of zhushing.  Again, naturally I jumped the gun this weekend and skipped ahead to Step 2.  While we did paint a lot of trim and get out the razor blades to scrape paint off window panes, I also happened upon an AMAZING sale Friday.
 
Enter RugsUSA.com and their incredible 60% off sale.
I was able to snag two huge 8x10 rugs: 1 for our bedroom and 1 for the dining room!
 
Rugs USA Homespun Trellis Sunshine Rug
via for the dining room this actually has a grey design which will be a perfect tie to the living room.
 
Rugs USA Tuscan Chevron Flatwoven Sand Rug
via for the master!
 
Also, not sure why this is showing a blue border on both rugs, but that's not actually on there.  I CANNOT wait for these two rugs to show up on my doorstep this week! 
 
Surprisingly enough, I think the dining room might be the first room finished - I have a fun and inexpensive wall decor DIY that I'm going to try out later this week and then this should be pretty close to done.
 
We did tackle some annoying things from Step 1's project list this weekend, but let's be honest, none of you care about how my dutch door is now a new, hardly noticeable but brighter, shade of sparkly white.  Although I must say, I feel incrementally better about the kitchen now!
 
This week, we'll finish the trim painting once and for all, and make a plan for the crown, base and cornice boards with my brother in law - cannot wait for those!  Then we'll have to figure out if we have time to tackle Step 3 before the party, which I'm terribly excited about but can't get too ahead of myself with.  You'll just have to wait and see like me, if we get there in time!
 
Pick up any free or cheap thrills this weekend?
 
xoxo,
KC
 

Friday, October 26, 2012

Falling into Fall

Yesterday it was 75 and sunny and this morning all the leaves on our biggest tree in the back are officially down and it's a chilly 40 outside. 

D and I snuck in an unseasonably warm walk with E the other evening and it felt like a Texas fall where it's just warm enough that you can smell the leaves your crunching.

she loves the crunchy leaves almost as much as she loves snow!
 
Last night I picked what will likely be the last of our peppers and green beans and almost the last of our tomatoes.
I really want to try making some fried green tomatoes with some of our bigger, but still green tomatoes.
 
The wood rack has found a new place on our porch and all stacked up with new logs from the tree we removed last week. I'm sure we'll be having quite a few fires this weekend.
 
i love all the texture in the the round little pieces
 
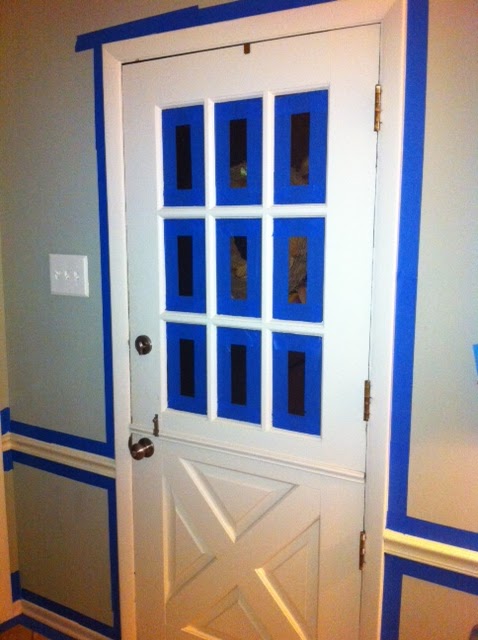
I have a 6 week plan to get the final details of this house complete, less the den redo and basement clean up.  First step - finish painting all the trim!  Started getting ourselves motivated by taping everything off last night - the blue tape will be a constant reminder to get it done until we finally pick up the paintbrushes.
 
our adorable dutch door
 
What do ya'll have in store for this weekend?
 
xoxo,
KC


Wednesday, October 24, 2012

The Magic of Spray Paint: Halloween Part 1

So we are just a few days away from Halloween and this year I'm seriously hoping for more than 10 trick or treaters!  In years past we just haven't had too many, and I'm not sure if I should attribute this issue to lack of kiddos in our old neighborhood (entirely possible with lots of our neighbors being "original owners" to the circa 1920 bungalow homes) or some new trend in trick or treating.  I don't know maybe people drive to better places to trick or treat now? Who knows!

At any rate, I'm not lowering my expectations, in fact, I'm doubling down on some legit visitors.  To this point, I have actually decided to invest in this holiday i.e. decorate. Admittedly, I've resisted investment in the past due not only to lack of visitors but also lack of acceptable decorations.  I don't do icky or scary well and things get pretty "country cottage" pretty quick when it comes to this season.  I don't need corn husks and 50 shades of tan, burgundy and orange to convey fall - I'm a bit more simple than that.

After not finding anything that was really going to fit the scale or style I was looking for, I decided to make my own door decks - enter project #2 for our spray paint series and the first half of my halloween holiday decor.

I actually saw some super cute, but weirdly expensive Styrofoam glittery BOO letters at our local grocery store but at $30 a set so $60 for both of my front doors, I passed. And lets be honest D would have had a fit if I came home from the GROCERY store with $60 of Halloween decks...  Plus the B and one of the O's was black glitter with the other O in orange glitter and black just doesn't show up well on our taupe doors.  BUT there was an idea there.

I picked up a two sets of BOO letters at Michaels for about $2.50 each, along with a can of orange Kyrlon spray paint and some black and cream striped wired ribbon.  So for about $20 I had the beginnings of something.

Much like the wood holder, I started out by covering the grass with a drop cloth, shaking my paint and starting with long wide passes that went beyond the edges of my letters.


here's where things began to get harry...
 
Remember when I said some surfaces should be primed because spray paint doesn't stick well on them?  Apparently this was one of those surfaces.  While the letters themselves were wood, they were already painted white, with almost an enamel finish (most likely so you could hang as is).  I realized this would be an issue almost immediately when the paint was doing more of a pool than a stick and dry.  Ick.  Instead of freaking out and trying to fix it in some way (spraying more, wiping off excess, etc.) I just stayed SUPER patient with it - which is so not typiical for me. 
DO NOT pile on more paint hoping that things will look better - it never works that way, just stay patient and let it hopefully sink in and dry out. Thankfully this eventually (i.e. about an hour in between coats instead of the usual 10 minutes) worked and I had these guys all oranged up.
 
all painted up and no where to go.
 
By this point after 3 coats/hours of drying, and a couple days on hiatus in the garage, I realized these puppies would be too big to just hot glue onto my ribbon. Enter the yard sale posts!  I picked up a few of those 30 inch long posts from Michaels for about a $1 each - I wanted some wider, longer wood posts but could only find balsa wood which is just too thin and fragile for this particular project.
 
I then grabbed my other supplies and went to town putting these together.  Basically I took this craft glue and covered the posts completely by spreading the entire surface with glue with a foam paint brush.  I then delicately placed the ribbon on top of the glue and made sure it was even and secure.
best all purpose glue ever + cute cheap "halloween" ribbon that I plan on using year round.
 
After about 5 minutes of setting time, this was good and secure and I was ready to place the letters orange side down on the work bench and the new ribbon covered post on top of the letters.  With 6 small nails per BOO board, I hammered letters into place by affixing both the top and bottom backs of each letter to the board via nails.
 
To finish this project off I created a little loop with tails on top for hanging and snipped a tail for the bottom ribbon to give it a little more sass.
 
one BOO

And what's one BOO without TWO!?
 
honey Boo Boo, child.  sorry i simply cannot resist.
 
So what do you think?  Easy enough?  Spray paint makes everything glorious!  Back with more silliness soon!
 
xoxo,
KC


Tuesday, October 23, 2012

Weekend Recap: Pack Attack

Hello Kiddos!

Sorry for the much belated posting.  Last week D and I were prepping for my family's arrival and yesterday I was just plain old recovering!

To be totally honest I had to get over the emotional hangover that is saying goodbye to your family as an adult.  Somehow this didn't seem as hard when I was clamoring to get back to Mizzou, but now watching them all get packed up and leaving on various airplanes and hitting the road makes me a little sad and wistful for the days when we were all in one city, or even one country.

Sappiness aside, this weekend was super fun, full of yummy meals, cuddles and even a little productivity. My parents got in Thursday night and we gave them the newest tour (complete with some temporary curtains D put up the night before - best hubs ever.)

nothing like installing curtains the night before your in-laws arrive. love you D!

We were up and at it early Friday AM for a trip to my FAVORITE STORE EVER - k. hall for their warehouse sale.  Several candles, soaps and other smelly treats later, me and Kath headed to pick out some new fabric for a few pillows, valances and cafe curtains for the house.  We revisited that awesome fabric house and I got some super cute blue and cream linen with a monotone peacock and floral print for the kitchen and this rich watercolory linen for pillows in the living room - I want to incorporate pops of mustardy/citriney yellow/gold to warm it up a bit. 

Landsmeer Citrine
seriously taking pics of the living room soooon.  Just need to pull the
 trigger on a few more elements.
 
Without going totally schizophrenic on you, I also got some awesome black and white buffalo check for my office - can't wait to finish up the desk and get the valences made to show you all that!
 
The big purchase of the day was a sewing machine!
Singer 6180 Brilliance Sewing Machine
Kath already showed me a few tricks on this guy but I hope to be a pillow making machine in a few months.  This combined with my trusty staple gun (for custom cornices - duh) and I should have all my windows dawned by Christmas!
 

Friday night the twinies got in and there was a lot of cuddling this
Photo: Coffee, fam and my favorite pup :) http://instagr.am/p/RAawi5CVC2/
the main mitchell diva, barkley.
 
by this.
 
First fire in the new house!
 
 
Saturday we took down a tree in the back yard with both sets of in laws - can you say domestic?  Before and after pics later this week! We also watched THE BEST MOVIE EVER  that night, outside by the fire on our projector.


Kath said it was "right up there with On Golden Pond" which is basically
cinematic greatness in our book and this was definitely the perfect outdoor fall movie.
 
Sunday we had the main event of the weekend - the Rams Packers game.  Being cheeseheads, I'm sure you can guess who we were rooting for.  If it's still not obvious, these clues may help:
 
mimosas + bloody marys
 
 
Photo: Might as well be his super bowl. #gopackgo http://instagr.am/p/RDHq8duTCs/
Big T tailgating in some fly Tory Burch Ray Bans curiosity of one of his daughters
 
We brought home a victory and topped off the gorgeous day with some steaks.  It was a jam packed weekend of fun and I was super sad to see them go but excited to reunite in a few short weeks for Thanksgiving.
 
What have ya'll been up to these past few days?
 
xoxo,
KC

Thursday, October 11, 2012

The Magic of Spray Paint: Wood Holder Edition

So let's start a new little series called "The Magic of Spray Paint" because let's be honest, it fixes EVERYTHING. I've spray painted lamps, chairs, tables, curtains, wedding decorations, general decorations, EVERYTHING. 

The key to spray painting is multiple, very thin coats.  It only starts to look janky (PS we got Big T to start saying the word janky and it is HIL.AR.IOUS.) when you try to get it all covered in one spray because then it starts running and there's almost no way to fix that problem.

You also have to be super cognizant of the surface you're spraying - is it going to accept paint (i.e. wood, iron, steel, brass, cotton, cardboard, etc.) or is the paint just going to chill out on the surface and never actually dry (particle board, slick plastic, anything epoxied) - most annoying problem ever.

On Sunday I was a spray painting fool, cleaning up a few Tri City purchases, making some Halloween decks and giving a recent hand me down new life.

We recently got this wood holder from D's mom, which is great because they usually cost $60+, but it was in need of some major TLC.  Tons of rust all over this guy and it's once black iron color was now a nubby rusty brown.

 
hello tetanus! tarp covering wood = not pretty.
 
This may seem like a no brainer but you definitely need to make sure you're in a well ventilated space with plenty of covers on anything you don't want splattered.  I say that because the basement of our old rental may still have some black spots from spray painting adventures.  Oops.
 
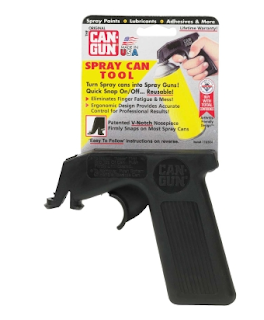
You also want to make sure you select a paint that's appropriate for your end use.  For this project I used a Kyrlon indoor/outdoor in Forest Green but usually tend to use Rust-o-leum which has a TON of colors in various finishes, all great for indoor or outdoor use.  I also have a few of these guys on hand which help with the old index finger crampage.
 
 
Make sure that when you're spraying you over extend on the edges.  Example: if you are painting something with horizontal sprays like this wood holder, you spray left to right (or visa versa) but don't stop at the actual end of the piece you're working on, continue past it just a bit so that when you change direction go go back over you're work you don't glob up the ends (that's an official term)  If you don't do this, you'll end up with spotty edges on your piece that will likely run and mess up the overall finish.
 
One more tip - if you're working on a rusty piece definitely try to scrape as much rust off as possible - the rust will soak up the paint quick and give you an uneven finish in places that don't have as much rust.  If it's super uneven, scrape as must as you can off and use a spray on primer (available right next to the spray paint) to create a better base.  You can also try your hand at painting some of those tricky surfaces (particle board, slick plastic, etc.) after you use a primer which usually creates the tacky base you need for a successful spray.
 
So here's this guy all cleaned up.  It doesn't look that special unless you think about how crummy it looked before.  I'll post some picks of it in it's new home once I finish up the Halloween decks.
 
What have you painted lately?

 
xoxo,
KC
 

Tuesday, October 9, 2012

Weekend Recap: Tri City Greatness

With my mini love note yesterday to D for our 1 year anniversary, we didn't get to talk weekend recap.

This weekend was crazy town busy!  Friday I watched the first of the 10ish Cards games I'll watch all season - I'm a fair weather fan - quite literally!  I'm not interested in actively watching the boys during a St. Louis summer.  No amount of beer makes sitting in your own sweat cute.

Now that the Cards are officially in the playoffs (tied with the Nationals as of yesterday!) I can embrace the game in my own special way - ridiculous watch parties with lots of red!  Stay tuned for that.

Saturday D and I got up and met our friends X and N for the Tri City Garage Sale.  This is an annual event that I try to hit but missed last year as it was the weekend of our wedding.

Over the years I've gotten some SUPER bargains - all our dining room chairs which I painted and recovered, plus a table which I gave to my sister A, my desk, a vintage steamer trunk for D's side business (more on that in a minute), and tons of fun zhushing elements.

Well despite my furniture hall of year's past, this might be THE GREATEST YET, even though we only spent about $30.  Enter, the 49 star flag!

holy scary outfit, k.  good thing that flag is amazing.
 
 
Not to get all Antique Roadshow on you, but the 49 star flag was only made for 8 months - 8 whole months!! - from when Alaska was inducted as the 49th state in Jan of 1959 and Hawaii was inducted as the 50th state in Aug of 1959.  The best part of this find?  It was only $10.  Amazingness.  I'm planning on making this the center of our den redo which we're hoping to start on in December after we make a final push to finish up the upstairs and main level.
 
Other exciting finds of the day include: a gigantic clock, a vintage globe, an antique printing set, a stately planter in need of some TLC, a sassy metal orange bookcase, original Ball Mason jars, and a brand spanking new projector screen which we'll put to great use.  We also picked up lots of colorful vintage books - always a fun find and great bookcase maker!


the cornwell hall
 
 
X was much better than I at immediately finding homes for all her new treasures and snapped this pic of the bookcase, globe, some books and mason jars all zhushed up in their office.
 
look at that zhushing! love it!


The rest of the weekend was full of unexciting things like painting outlet covers and bathroom trim in preparation for my family coming in a few weeks.  I did take off Saturday night to visit D and his brother J at Grove Fest, a neighborhood festival where they were promoting their side business, 314 Threads.

the booth was looking pretty messy at this point as we were huddling like crazy to stay warm.
 
That's it!  Back later this week with some spray paint transformations and holiday projects!
 
xoxo,
KC


Monday, October 8, 2012

This is the 366th day of my life...

This is the first day of my life.  That's the title of the song me and D danced to a year ago today.

It's a special song to us mostly because it was released right around the time D and I first met in 2005, actually right around the time that we first fell in love.  It's definitely a "different" wedding song, but I feel it really encapsulates everything we felt at the time, back in 2005, again in October of 2011 and still today.
 
Remember the time you drove all night
Just to meet me in the morning
And I thought it was strange you said everything changed
You felt as if you'd just woke up
And you said “this is the first day of my life
I’m glad I didn’t die before I met you
But now I don’t care I could go anywhere with you
And I’d probably be happy”
 
D and I have been together for almost 8 years now and experienced A LOT together, but I can honestly say that right around the time this song came out, I knew this was the man I'd marry. He is not only the love of my life, but my very best friend.  Someone who sees me and loves me and challenges me in a way that really does change everything.

 
Our wedding was a year ago today.  Detailed out here by the incredibly talented Donnell Probst! With the theme of you guessed it...The Newly Cornwells.
 
 
We had our small but heartfelt ceremony in a church by Forest Park and our reception at the Forest Park Golf Club.  The entire day was a whirlwind, as most weddings are, but in talking about it again this morning, we both recanted the exact same favorite memory.
 
The early evening ceremony was so emotional and totally blew me away more that I thought it ever would and the ladies at Cosmo did a killer job of executing everything I had planned, but my favorite part of the day was actually away from everything. Between the ceremony and the reception, the wedding party boarded a bus and drove around Forest Park, right around sunset, making sure the guests had plenty of time to get settle in before making our entrance.
 
At one point, with 3 bottles of champagne left, we made it to the top of Art Hill, a beautiful high point in Forest Park that overlooks the golf course and most of the park. With just the slightest hint of Fall in the air, the sun setting and the lights from the club house twinkling, it was the most perfect part of the night. 
Donnell did a wonderful job capturing the day, and all the emotions therein, but at the end of the day, this grainy iphone picture is one of my most prized pictures of the day. Surrounded by my 3 most favorite people in the world is exactly where I'd like to be any day of the week. Isn't it funny how that works out?
 
cameo by O's super reflective tennies!
 
 
at the end of a wonderful day, off to the hotel and then ITALY!


Happy 1st Anniversary, babes.


all my love,
kate.